Tag Archives: stitch

round 5: knitting a baby blanket (with pattern!)

Through the winter months, on road trips from Utah to Louisiana and sitting on couches in Oregon with family, I knitted this baby blanket. It’s one of my favorite blankets to date (and I know I keep saying that), but I’m getting better at the knit stitch, and this time the yarn also made a huge difference. I used “Ocean” by Paton Colorwul, which is 100% wool, and I absolutely loved it. Wool yarn is expensive, and it can be scratchy, but when it’s done right, no other yarn compares. As I am wont to do, I ran out of skeins and had to frantically track down the last one from a Michaels across the valley. I’ve been trying to be more careful about buying skeins with matching lot numbers, but when you run out of yarn, you aren’t left with many choices.

13662233_10210349025268434_5866919687175656328_o.jpg

close up of knit stitch in “Ocean” by Paton Colorwul

The blanket was finished just in time to serve as a gift to a friend who gave birth to her son last month. I have identified somewhat with her journey to motherhood (i.e., she’s had love, life, travel, education, and a career before she very actively chose motherhood), and so I liked giving her an extra special gift.

The Materials:
-6 skeins of “Ocean” by Paton Colorwul
-Knitting needles, US 10.5

The Pattern:
-Cast on 76 stitches.
-Knit purl, knit purl, purl knit, purl knit until the row is finished.
-Then reverse it: purl knit, purl knit, knit purl, knit purl until the row is complete.
-Continue this pattern until you’ve got a few inches of a ribbed border.
-Then, knit the rest of the blanket until the last few inches or so.
-Finally, repeat the pattern from the beginning (knit purl, knit purl, purl knit, purl knit; then reverse it on the next row) to create a ribbed border again at the other end.

13701237_10210349013868149_2341488862930066767_o.jpg

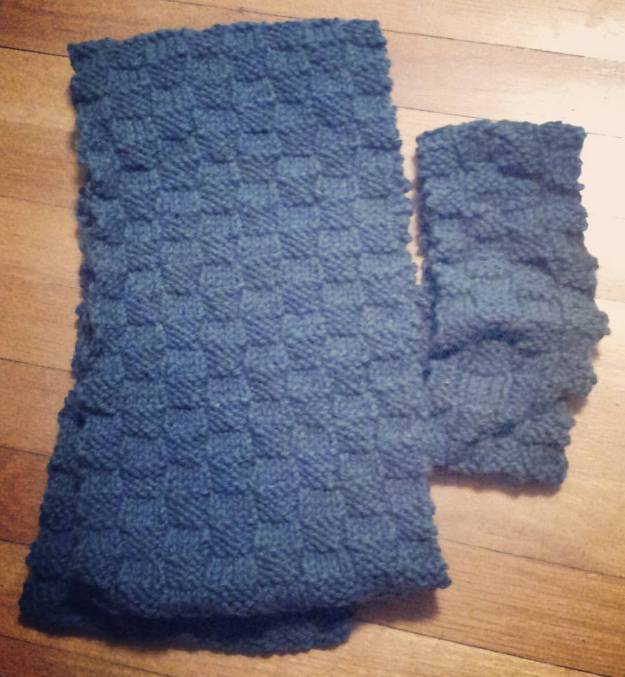
nearly finished baby blanket

The finished product should be rectangular, with a ribbed border at each end. I’m getting better at making even stitches, and so the wobbly edges of my previous blankets are starting to disappear (though not entirely).

My idea for the ribbed border on the ends was actually difficult to keep track of. There is an easier way to do ribbing, but I wanted the ribs on this border to be a little thicker. Normally, I like very absent minded knitting (for which baby blankets are perfect). But, these borders were knitted and torn out a few times before it was all said and done. It still ended up a little uneven in places. The take away: if you’re looking for an easier border, there are easier patterns out there. If you’re looking for the perfect yarn for a baby blanket, look at the Paton Colorwul selection.

Advertisement

knitting scarves and headbands in basket weave

This year I made a few headbands and scarves to give away as Christmas gifts. I’ve done this before, but this year there’s a marked improvement in the quality if my stitching. I’m using better yarn (wool and wool blends) and experimenting with different stitches. This year, I learned the basket weave stitch, which is featured here.

For the basket weave, you cast on the number of stitches that you want. (It has to be a number that is divisible by four.) Then you knit four, purl four, knit four until you’ve reached the end of the row. You turn it over, and you repeat: knit four, purl four until you’ve reached the end of the row. In each new row, you’re actually knitting and purling the opposite of what you stitched in the previous row. Repeat this knit/purl pattern for four rows, and then reverse it. Purl four, then knit four until the end of your row. Continue switching it every four rows until you’ve reached the end to create the basket weave texture.

The end result should look something like this:

12496298_10208685273635683_3237265430737643510_o.jpg

basket weave

For my first attempt, I made a scarf that had about seven inches of basket weave on both ends and regular knit stitch for the rest of the scarf. I didn’t love the way it turned out. In addition to the ends, I think continuing the basket weave stitch along the sides of the scarf would’ve created more continuity throughout the piece. So, I’ll continue to experiment with that.

Here’s a picture of the first attempt that paired basket weave paired with a regular knit stitch:

12489378_10208685271595632_5758091019624433059_o.jpg

scarf and headband with Patons Classic Wool (worsted) in Dark Grey Mix

What I think really turned out well was the scarf done entirely in basket weave. For it, I used Patons Classic Wool worsted in Jade Heather and US 7 (bamboo) knitting needles. I made a headband first, and then used the remainder of the skein on the scarf (which could’ve been longer).

Here’s a picture of the scarf and headband that I liked the best:

12469438_10208685274755711_2153974380356381323_o.jpg

scarf and headband in Patons Classic Wool (worsted) in Jade Heather

For the headband, I cast on 16 stitches, and then proceeded with the basket weave until it fit snugly around my head. Then, I cast off and stitched up the ends of the headband with the loose ends of the yarn and tied it off with a simple knot.

For the scarf, I cast on 32 stitches (and this width was absolutely perfect). I then proceeded with the basket weave until casting off at the end of my skein.

I’ll definitely continue with the basket weave. Once you get the hang of it, you can do it pretty mindlessly (while watching tv, road tripping, etc.), and the end result creates a lot of nice texture and depth.